Category: Project

  • New Saw …New Crosscut Sled

    New Saw …New Crosscut Sled

    Out with the old

    So with the new saw, I needed to update a few of the jigs I had. The first one I needed was a new crosscut sled. I couldn’t reuse the old sled for a few reasons, which I will describe in a bit. Now I can use standard accessories on the table saw. Yeah! The only downside was that I’d have to rebuild my current sled, which was a blessing in disguise.


    Mistakes Made

    So the first mistake I made was buying that old table saw. Sorta. But back to the sled. The sled I built was square and ran smoothly, but because of the wobble in the blade the slot had widened up so that it was hard to tell where to line up the piece I was cutting. The old saw had 5/8 inch rails, bad. The new saw has 3/4 inch rail, good. Additionally I made the mistake of testing a miter cut on the sled, and the wedge cut out of it made the alignment issue even worse. I posted a picture on my instagram, it’s bad.

    https://www.instagram.com/p/CJrI5obpi5D/?utm_source=ig_web_copy_link

    A Clean Start

    Starting over was nice. Clean wood, all new, freshly cut, and not a hodgepodge of scaps I had in the garage. I just started using nice plywood for a lot of my jigs and I love it. I used Sande Plywood, as Lowes didn’t have Baltic birch at the time. It’s nice a nice low void ply with a smooth finish.

    I also low using High Density Poly Ethylene (HDPE) for my rails…

    Why so popular? Here’s why:

    • It’s lightweight yet super-strong. That’s why an HDPE milk jug that weighs 2 ounces can carry a gallon of milk. And why many carmakers use HDPE fuel tanks—lighter weight car parts can help increase fuel efficiency.
    • It’s impact resistant. Drop the toy truck down the stairs and it bounces.
    • It’s long lasting and weather resistant, so that plastic lumber deck in the backyard can entertain generations of families.
    • It resists mold, mildew, rotting, and insects, so it’s great for underground pipes used to deliver water.
    • And it’s easily molded into nearly any shape, providing one of the primary benefits of most plastics: malleability.

    What is HDPE Source

    Its a plastic so you need a sharp blade to cut it. Preferably a specific blade for plastic. My new table saw has an amazing stock blade so I tried it and it was almost perfect. I did need to plane the edges to the correct dimension but that was pretty easy.

    They turned out great:HDPE Rail Details

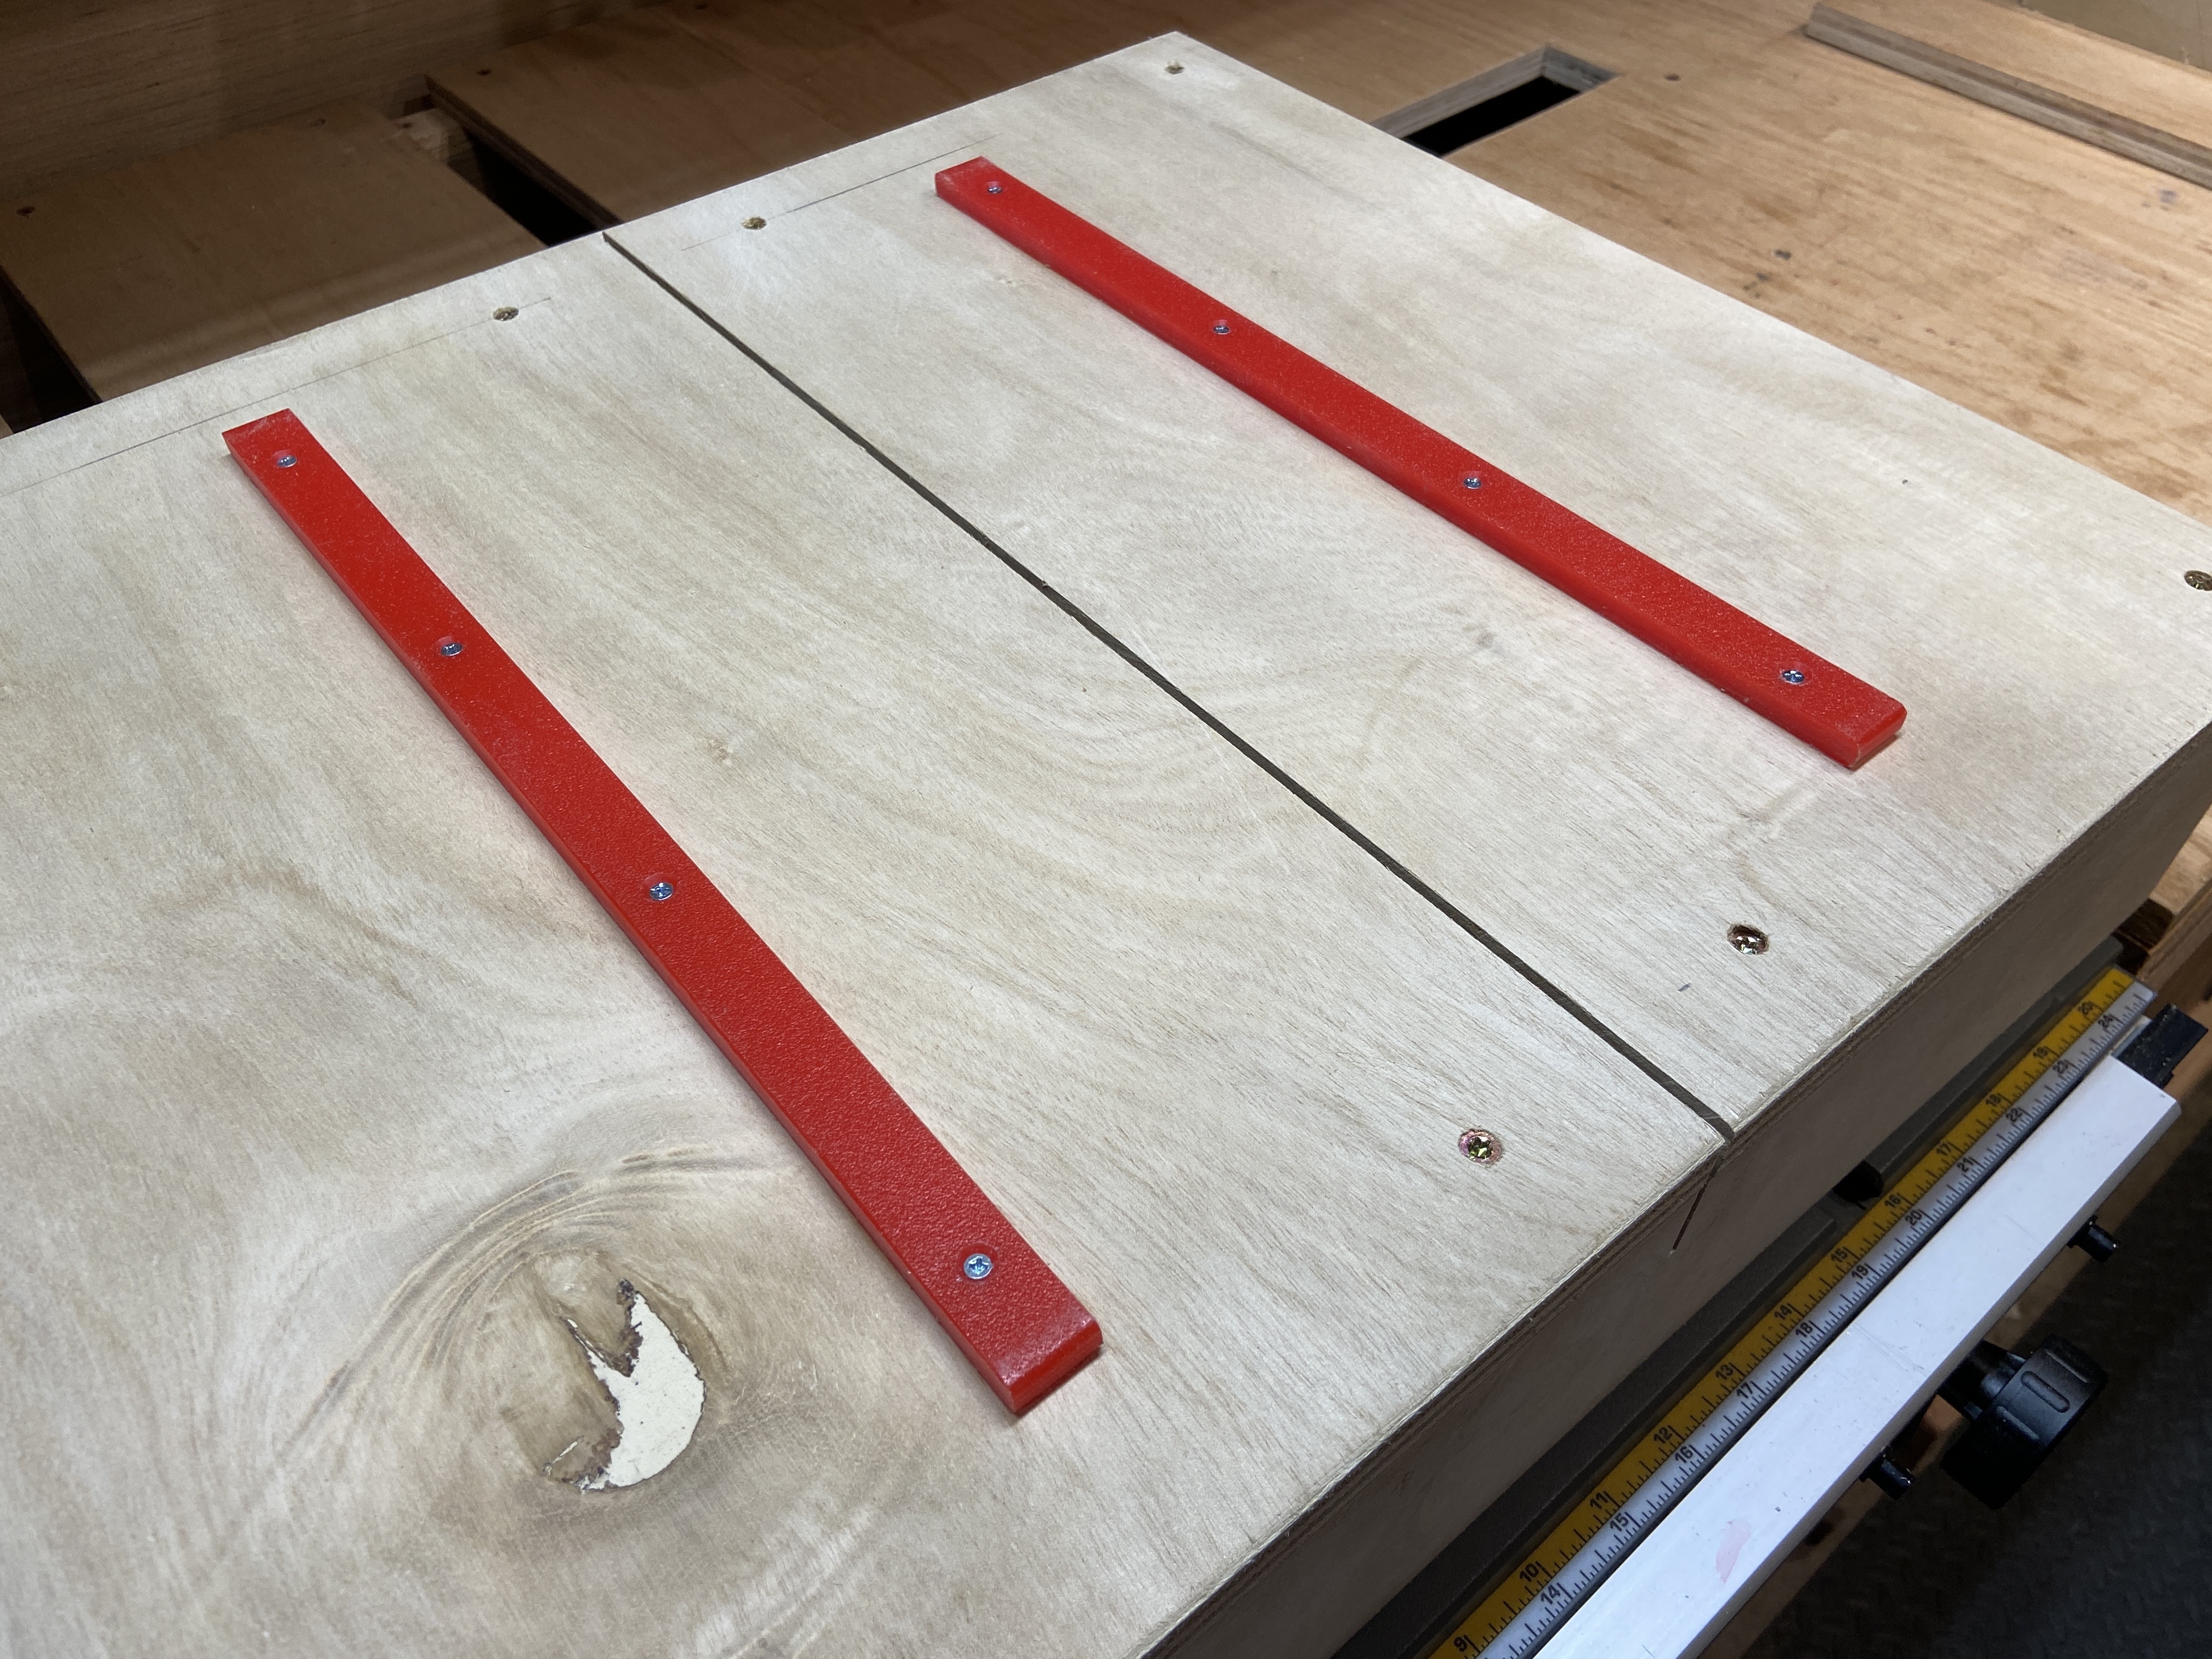
    HDPE makes great rails because they slide well, and they’re super durable. This was a cutting board in a former life.
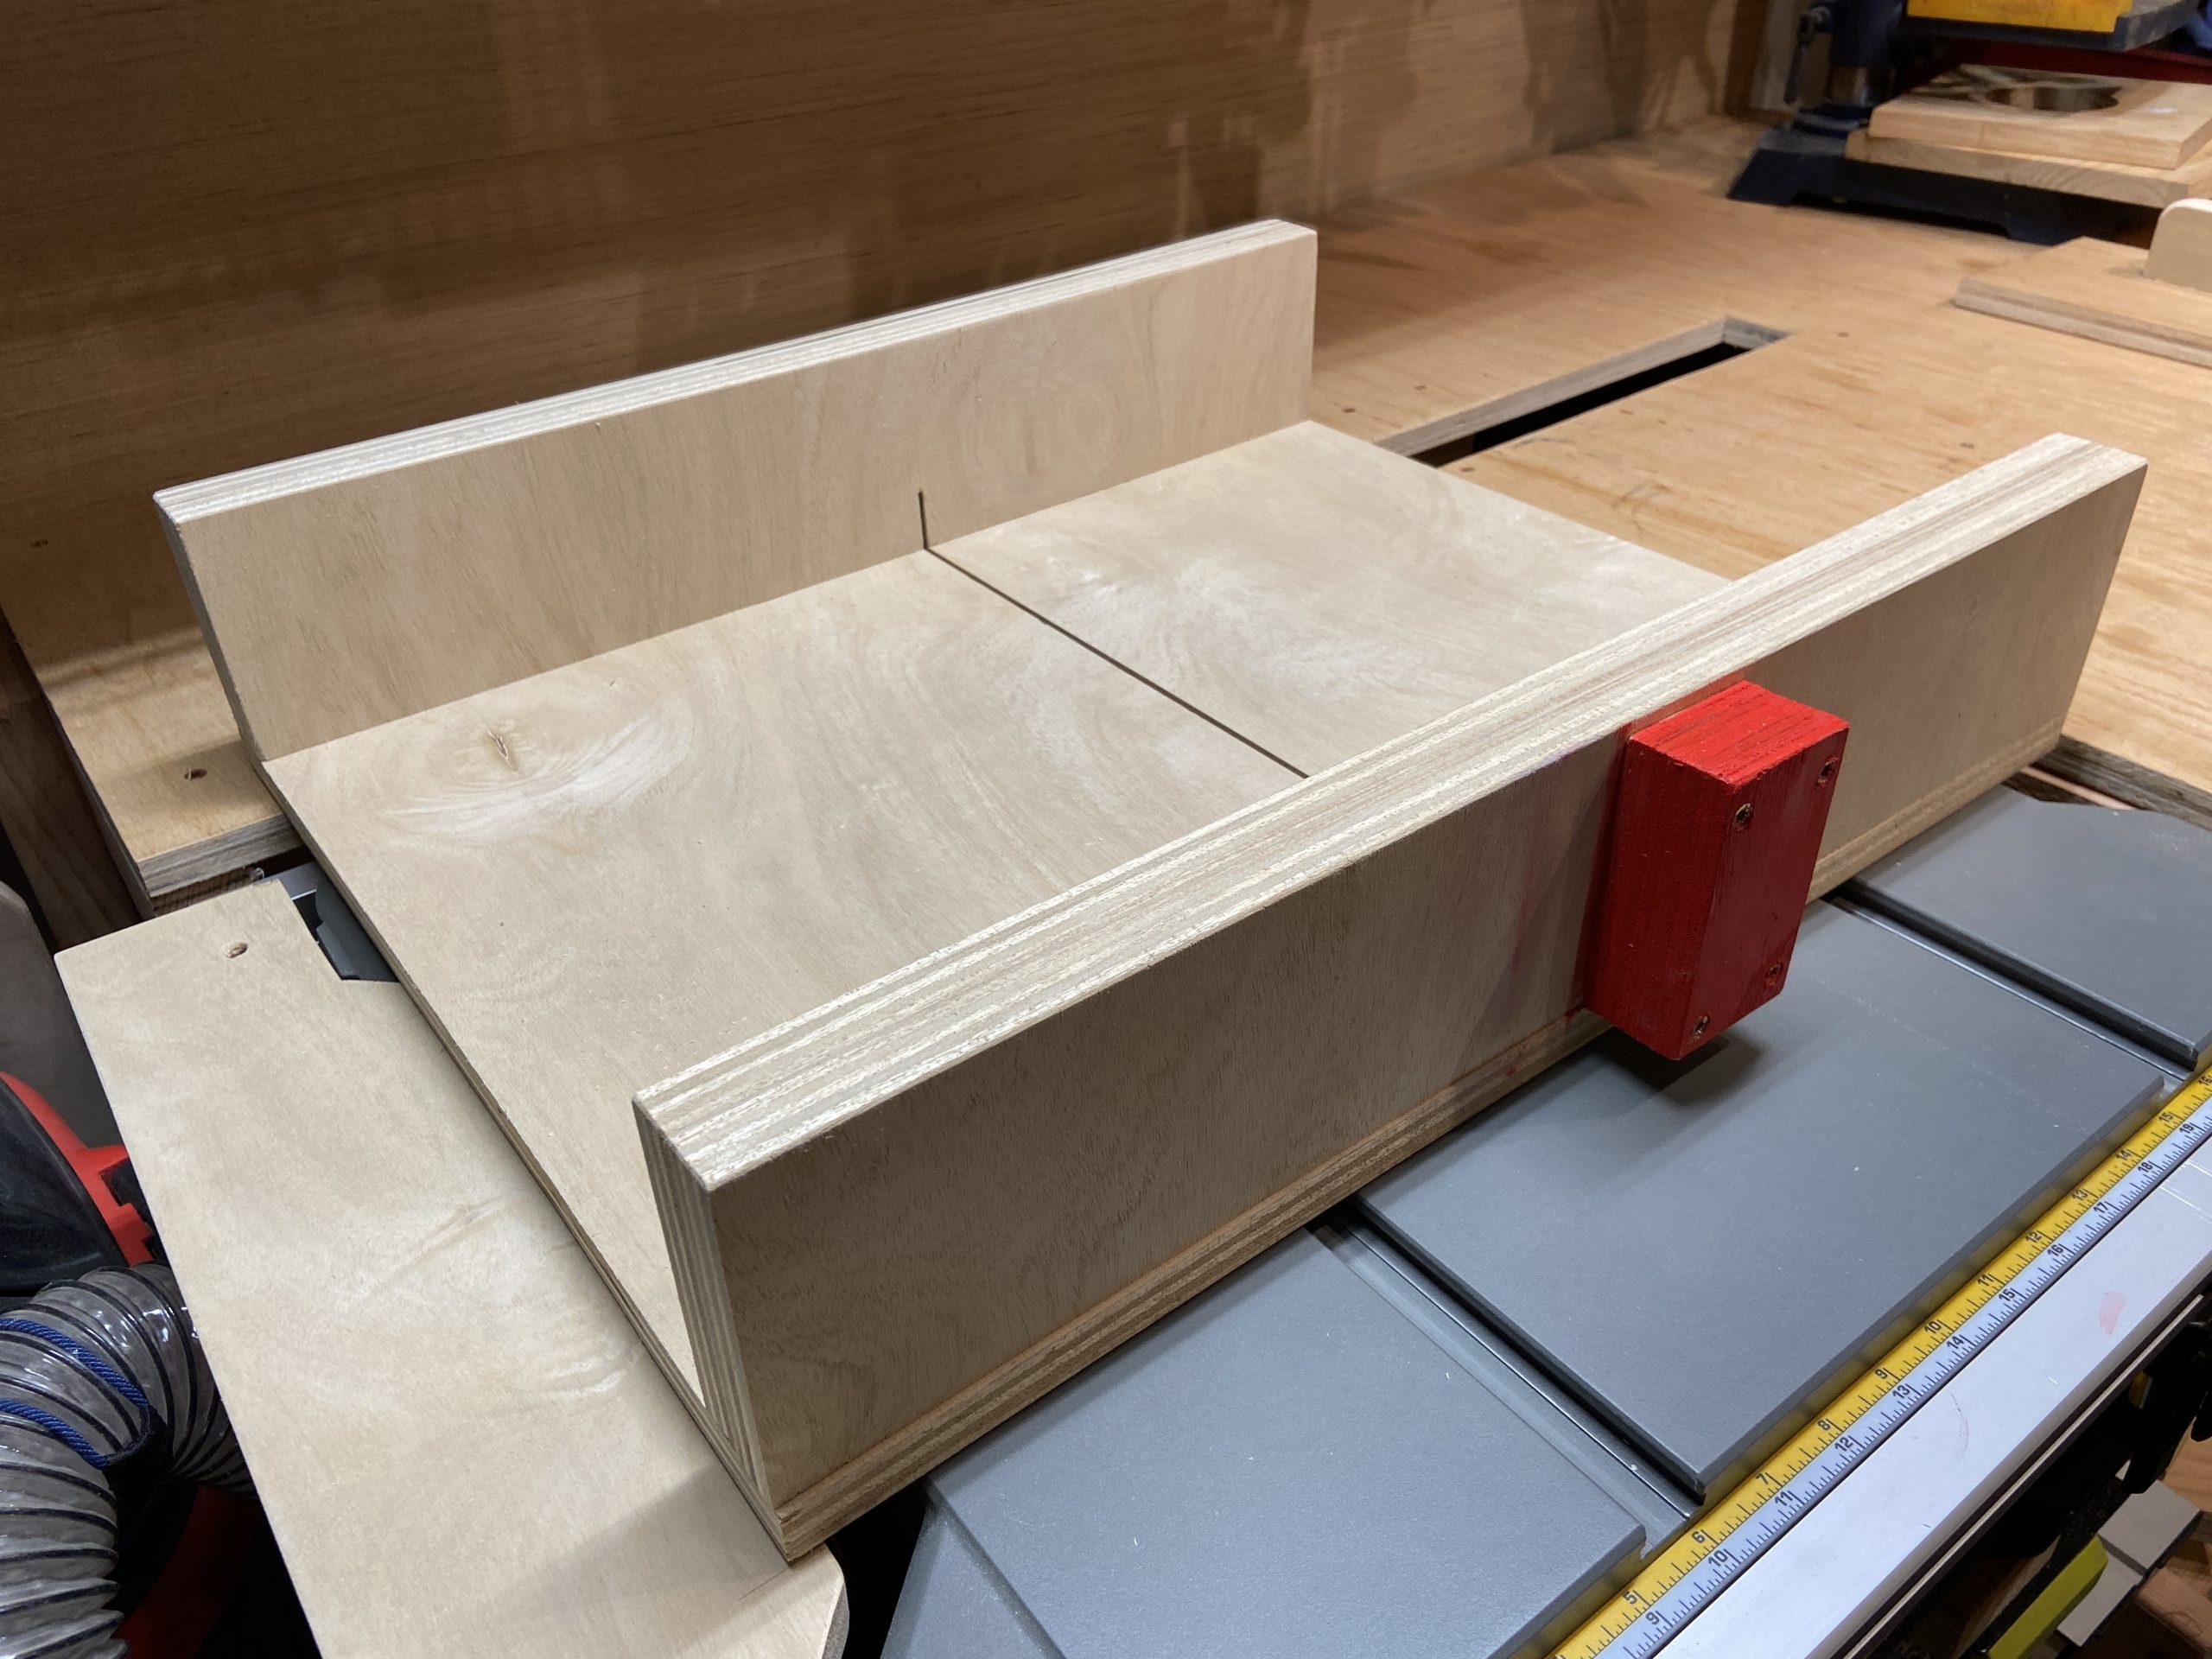
    The Finished Sled

    I won’t go into details on how I made this, there are a ton of videos out on youtube.  Video 2 is great because Mr. Ng describes how to verify its square… (Video 1, Video 2, Video 3)

    Basically I ripped four 4″ strips of 3/4 ply for the front and back, laminating them together. I cut the slide to the width of the table saw, but the depth was based on my storage space. A little shallower than I wanted, but it fits under my saw in the workbench. I also added a thumb-no-go-block, so I would remember to keep my fingers away from the blade… small detail but worth it.

    Here is the finished sled:

  • Stacked Dust Collection Cart

    Stacked Dust Collection Cart

    New Stacked Design

    Before I start any project I research what everyone else has done. I look through Youtube, Pinterest and do a few Google searches for what other builders had created for dust collection carts. For this project I wanted something super compact, moveable, and stable.  I started by researching shop vacs, and dust collection systems. Stumpy Nubs had a great video on 11 Common Dust Collection Mistakes.  After watching this I decided that a shop vac was a better choice because of all the small tools i used (orbital sander, track saw, bench top sander etc).

    The Rigid VAC4000 seemed to fit the bill perfectly. Small, powerful, lightweight, and great reviews.

    I started with an rotated cart design like this design I found on pinterest. I tried it for a while, but I had to disable the wet vac float mechanism, because gravity wouldn’t keep the float down because it was sideways. I also thought it took up a lot of room, especially if I used a Dust Deputy cyclone, they’re tall.

    My design is a stacked dust cart design, reducing the footprint to that of the vacuum itself. With the shop vac on top, I could lift it off and use it separately when I needed to.

    Here is what I ended up with:

    It turned out well. It rolls around quite easily, and it’s stable. It’s also a much smaller cart than the one I’d mocked up before.

    Dust Stopper Modification

    One other thing of note. When I first assembled the Dust Stopper my suction was terrible… I had read someplace that there were leaks around the bucket lip, so I added some weather stripping… Boom, huge improvement. So if you get a Dust Stopper, add a seal around the bucket.

    Weather Strip

  • Movable Table Saw WorkBench

    Movable Table Saw WorkBench

    The Old WorkBench

    My old workbench was frustrating me one day, so I started designing a new movable table saw workbench. The table surface was small, and the storage underneath was hard to use and limited. A small shelf underneath, and the top was only 24 inches deep. I was always trying to push parts and tools to the back while I was working… but there was no room. The table saw was in an awkward position, cantilevered off the left side.

    Old Workbench

    Poking around on Pinterest and YouTube I found a few ideas for mobile table saw workbenches:

    I started drawing my ideas to work out some of the details and variations. Eventually I settled on something, and figured out my cut list, and materials.

    The New WorkBench

    The new design was so much better. The new table has a 36″ square surface. The table saw is oriented so that it faces forward. Now I can stand in front of the the bench and make cuts. I had more storage underneath, because the shelves ran the full width, and I lowered the floor gaing about 4 more inches of height.

    New Workbench.. Crappy Saw
    Saw Detail

    The Crappy Saw

    Now I was all set… Except my Tradesman Table saw was crap:

    • No dust collection at all
    • Undersized miter tracks (5/8″) so nothing fit
    • The fence doesn’t square so I have to triple check the front and the back of the blade for every cut
    • The blade wobbled a bit, so my wood was always rubbing and burning

    While watching videos on building your own fence… I asked myself: Why are you wasting more time trying to polish this turd…

    I bought a Dewalt DWE7485 and tore the top half of the bench apart so that I could rebuild it to fit the new saw.

    New Saw, and Revised Workbench

    Now I had full use of the fence. The work is supported on both sides. The miter slots aren’t blocked so running a sled is easy. This thing cuts like butter. I can also lift the saw out and use it on saw horses if I need to.

    Here’s a gallery of my sketches.

  • De-reflector the Aero

    De-reflector the Aero

    I hated the cluttered rear on this bike. So I cleared off the reflectors. I’m going to add lights down the road to increase the visibility. (more…)

  • iPhone ChatterBox Cable

    iPhone ChatterBox Cable

    I am presently on a quest to get my gear connected. My iPhone to pump music and phone calls into my helmet, and my ChatterBox HJC-FRS so that I can communicate with other riders and my passenger. I do listen to music on long rides to break up the wind noise, but don’t really plan on making phone calls while driving. (probably just listening in on early morning conference calls) So how am I going to do this? The obvious solution is to use the equipment I already have and modify it to meet the requirements. So here’s the inventory. EDIT: This cable may break your ChatterBox. I have discovered that the Microphone circuit on my ChatterBox no longer transmits! I do not know if it was this cable that did it…

    (more…)